Showing 76 items matching electric date stamper
-
 Anglesea and District Historical Society
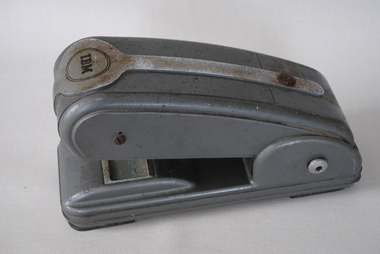
Electric Date Stamper, IBM, Estimated 1940's/1950's
... Electric Date Stamper...electric date stamper... Anglesea great-ocean-road Electric Date Stamper Heavy, metal ...Heavy, metal, machine with hinged top. Base plate: IBM/Typeno 7500 / 240v 4.3A 500(?) system / No 22539DZ 90 / Made in Germany. Rubber pads at each end and on base. Electric power cable not incuded.IBMibm, electric date stamper -
 Kiewa Valley Historical Society
Photographs – SECV – Clover Power Station
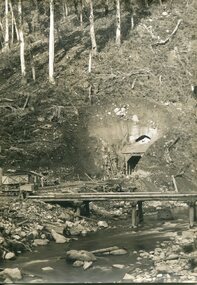
The Junction Dam and Clover Dam Power Station, stages of the Kiewa Hydro-Electric Scheme, were needed to meet the increased power demands of the wartime industry in Victoria. Clover added 26 megawatts to the grid. Junction Dam was completed and ready to hold water by September 1943, but was emptied in December 1943 and not filled again until May 1944. Construction of Clover Power Station commenced in July 1941 and both turbines were in service by May 1945.Clover Power Station and Junction Dam were part of the Kiewa Hydro Electric Scheme constructed by the State Electricity Commission of Victoria.Set of 22 black and white photographs taken by the official SECV photographer who gave each photo a number prefixed by K (for Kiewa) K60 -no date- A bridge and entrance to tunnel K519 -no date- Welding steel lining in the tunnel K531 –no date- Construction on the Kiewa Scheme (tunnel in background K821 – no date- Bogong Village, early days K928 -15 Oct 1942- Construction Clover Power Station K947 -26 Oct 1942- Construction Clover Power Station K948 -26 Oct 1942- Construction Clover Power Station K949- 26 Oct 1942- Clover Camp in background K950 -26 Oct 1942- Construction Clover Power Station K955 -27 Oct 1942- Constructing the bridge at Clover K1102 -7 April 1943- Inlet pipe to power station K1179 –no date- Clover Power Station K1187 – no date- Clover Power Station K1189 -24 June 1943- Part of the spiral casing 1199 -7 July 1943- Clover Power Station K1201 -7 July 1943- Clover Power Station K1231 -26 July 1943- Gantry crane for Clover Power Station K1308 -6 Sept 1943- Spiral casing K1334 -6 Oct 1943- Lake Guy. Bogong Village in background K1342 -29 Oct 1943- Power station under construction K1365 -19 Nov 1943- Power station under construction K1366 -19 Nov 1943- Gantry crane for Clover Power Station On the back- each photograph has a handwritten reference number starting with K and the date stamped or written (see above)secv; kiewa hydro electric scheme; official photographer; junction dam; clover power station; bogong; -
 Kiewa Valley Historical Society
Photographs – SECV – Clover Power Station
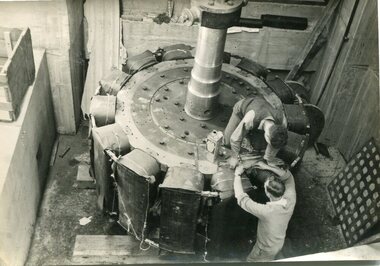
The Junction Dam and Clover Dam Power Station, stages of the Kiewa Hydro-Electric Scheme, were needed to meet the increased power demands of the wartime industry in Victoria. Clover added 26 megawatts to the grid. Junction Dam was completed and ready to hold water by September 1943, but was emptied in December 1943 and not filled again until May 1944. Construction of Clover Power Station commenced in July 1941 and both turbines were in service by May 1945.Clover Power Station and Junction Dam were part of the Kiewa Hydro Electric Scheme constructed by the State Electricity Commission of Victoria.Set of 21 black and white photographs taken by the official SECV photographer who gave each photo a number prefixed by K (for Kiewa) K1367- 19 Nov 1943 The rotor for the generator K1368- 19 Nov 1943 Base of the generator K1377- 2 Dec 1943 Generator under construction K1380- 2 Dec 1943 Power Station under construction K1381- 2 Dec 1943 Generator being assembled K1386- 3 Dec 1943 Part of the generator K1389- 30 Dec 1943 Inlet pipe work K1391- 30 Dec 1943 Inside the power station K1392- 30 Dec 1943 Inlet pipe work K1396- 27 Jan 1944 Equipment in the power station K1410- 4 FGeb 1944 Unpacking equipment for the power station K1422- 16 Feb 1944 Generator being assembled K1425- 22 Feb 1944 Water way – power station K1433- no date Generator being assembled K1434- 3 Mar 1944 Constr5ucting the power station K1448- no date Generator inside the power station K1450- 17 Mar 1944 Clover Power station K1452- 17 Mar 1944 Looking down on the valve-water release from the power station K1456- 22 Mar 1944 ‘half Travel Opening- No 1 Relief Valve’ Overflow from the power station K1458- 22 Mar 1944 Outlet from the power station K1462- 22 Mar 1944 Inside the power station On the back- each photograph has a handwritten reference number starting with K and the date stamped or writtensecv; kiewa hydro electric scheme; clover power station; junction dam; bogong -
 Kiewa Valley Historical Society
Photographs – SECV – Clover Power Station
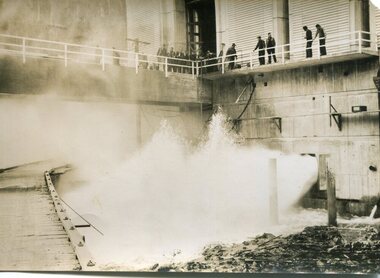
The Junction Dam and Clover Dam Power Station, stages of the Kiewa Hydro-Electric Scheme, were needed to meet the increased power demands of the wartime industry in Victoria. Clover added 26 megawatts to the grid. Junction Dam was completed and ready to hold water by September 1943, but was emptied in December 1943 and not filled again until May 1944. Construction of Clover Power Station commenced in July 1941 and both turbines were in service by May 1945Clover Power Station and Junction Dam were part of the Kiewa Hydro Electric Scheme constructed by the State Electricity Commission of VictoriaSet of 21 black and white photographs taken by the official SECV photographer who gave each photo a number prefixed by K (for Kiewa) K1463- 22 Mar 1944 Inside Clover Power Station K1464- 23 Mar 1944 Valve K1466- 23 Mar 1944 Fittings for the power station K1467- 23 Mar 1944 Valve K1472- 30 Mar 1944 Equipment being installed in Clover Power Station K1474- 31 Mar 1944 Equipment for the power station K1493- 19 April 1944 Transformer K1495- 28 April 1944 Part of the generator being installed K1514- 11 May 1944 Equipment in the power station K1563- 9 June 1944 Turbine under construction K1565- 22 June 1944 Shaft between turbine and generator K1567- 22 June 1944 Turbine in the power station K1568- 22 June 1944 Transformers K1570- 5 June 1944 Guide vane actuators K1574- 22 June 1944 Equipment in the power station K1567- 22 June 1944 Clover Power Station K1607- 14 Aug 1944 Equipment in the power station K1620- 27 Aug 1944 ‘Charles Tavare (?) Equipment in the power station K1626- 23 Aug 1944 Clover Power Station K1628- 23 Aug 1944 Clover Power Station K1629- 23 Aug 1944 Clover Power Station On the back- each photograph has a handwritten reference number starting with K and the date stamped or writtensecv; kiewa hydro electric scheme; clover power station; junction dam; bogong -
 Kiewa Valley Historical Society
Photographs – SECV – Clover Power Station
The Junction Dam and Clover Dam Power Station, stages of the Kiewa Hydro-Electric Scheme, were needed to meet the increased power demands of the wartime industry in Victoria. Clover added 26 megawatts to the grid. Junction Dam was completed and ready to hold water by September 1943, but was emptied in December 1943 and not filled again until May 1944. Construction of Clover Power Station commenced in July 1941 and both turbines were in service by May 1945.Clover Power Station and Junction Dam were part of the Kiewa Hydro Electric Scheme constructed by the State Electricity Commission of VictoriaSet of black and white photographs taken by the official SECV photographer who gave each photo a number prefixed by K (for Kiewa) K1630- 23 Aug 1944 Clover Power Station K1633- no date Clover Power Station K1683- 10 Oct 1944 Weir K1700- no date Tail boy for Clover Power Station K1710- 11 Oct 1944 Part of aqueduct – Clover K1767- 6 Jan 1945 Switchboard in the power station K1769- 6 Jan 1945 Turbine and shaft K1770- 10 Jan 1945 Houses under construction at Bogong Village K1897- 22 Feb 1945 Equipment in the power station K1808- 22 Feb 1945 Equipment in the power station K1910- 31 May 1945 Top of the turbine and the shaft K1964- 16 Jul 1945 Equipment in the power station K1970- 17 Jul 1945 Bogong Village K1983- 30 Jul 1945 Turbine in power station K1984- 30 Jul 1945 Bogong Village K1989- 2 Aug 1945 Turbines in power station K1990- 2 Aug 1945 Equipment in power station K1991- 2 Aug 1945 Bogong village K2011- 28 Aug 1945 Equipment in power station K2015- 28 Aug 1945 Generators in power station K2016- 28 Aug 1945 Top of the turbine and the shaft K2018- 30 Aug 1945 Spiral casing, the turbine and the shaft On the back- each photograph has a handwritten reference number starting with K and the date stamped or writtensecv; kiewa hydro electric scheme; junction dam; clover power station; bogong -
 Kiewa Valley Historical Society
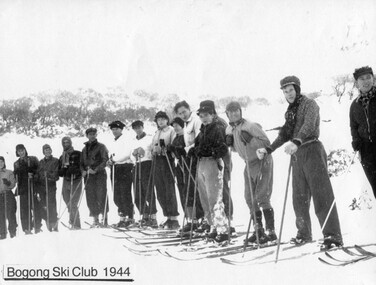
Photographs –Collection of 10 copies and original black and white photographs and printed articles relating to skiing on the Bogong High Plains
After World War II, the Kiewa Hydro-Electric Scheme was started in the Kiewa River Valley by the State Electricity Commission of Victoria. On land previously used only for summer cattle grazing in the natural alpine grasslands, the first ski lodge was built in 1948 by workers from the hydro scheme as skiing was a popular recreation. Many of the hydro employees were of European background and had grown up enjoying skiing and snow sports in their homelands and were keen to continue to pursue their winter sports interests. The first lift, a rope tow, was built in 1951 at Falls Creek and the first chairlift in Australia was constructed there in 1957. Two T-Bars were opened in 1961. In 1964, the Victorian Municipal Directory recorded that Falls Creek had 29 ski club lodges and 16 commercial lodges. The area became a popular tourist destination for both winter and summer sports.: Employees of the State Electricity Commission of Victoria in the Kiewa River Valley were the earliest skiers on the Bogong High Plains and built one of the first ski lodges at Falls Creek. They were amongst those pivotal in the development of the skiing and tourist industry at Falls Creek and on the Bogong High Plains. Collection of 10 copies and original black and white photographs and printed articles relating to skiing on the Bogong High Plains. Some pieces have been enlarged to A3 poster size copies for display purposes 1. Copy of black and white photograph of group of skiers at Falls Creek 2. Copy of photograph of early skier on Bogong High Plains with temporary buildings and tents in the background 3. Copy of photograph of 3 skiers on Mt McKay 4. Copy of SECV photograph of Rocky Valley Camp under snow 5. Early sepia photograph of Falls Creek village with skiers in the foreground 6. Copy of a page from booklet (SECV?) promoting the benefits of owning a holiday home in the Bogong Village area 7. Copy of a page from booklet (SECV?) promoting the benefits of holidaying in and around Falls Creek/Mt Beauty 8. Panoramic view of ski fields with skis in the foreground 9. Photograph of young skier (identity unknown) 10. Photograph of 2 male skiers (identity unknown) performing a small jump 1. Bogong Ski Club Members & Friends 1944 2. Jack Neve – electrician. Rocky Valley 3. 17.5.55 Skiers ascending Mt McKay 4. State Electricity Commission of Victoria. Date:17.8.55 No:K8132 Kiewa Hydro Electric Works. Rocky Valley Camp – From Engineering Office 5 & 9 No markings 6 & 7 Short article relating to photos on each page 8. Handwritten signature on rear of photo (Sandra Conea) 10 Faded unreadable photographers stamp and handwritten numbers 6875 on rear secv; bogong high plains; skiers; falls creek; tourism -
 Ballarat Tramway Museum
Slide - 35mm slide/s - set of 5, Noel Simons, 19/11/1962 12:00:00 AM
Set of 5 transparencies taken on 19/11/1962 on Kodak mounts. 1186.1 - Bendigo 21 bound for Golden Square at Charing Cross with The Beehive buildings and shops in Pall Mall in the background. Trams has an ad for Cohns drinks on front bumper, SEC Best for Cooking roof ad. and Mamouney's furniture roof ad. Two women passengers boarding. 1186.2 - Bendigo 26 crossing Pall Mall from Mitchell St. bound for Eaglehawk with "Ezywalkin" shop in background. Tram has an SEC 'Electric Cooking' roof ad and a 'Streets Ice cream' ad on front dash. 1186.3 - Bendigo 7 arriving at the Charing Cross stop, bound for North Bendigo. Has a Huttons dash panel ad, a Castrol roof ad. Buildings as for 1186.1. Passengers waiting at the stop. 1186.4 - Bendigo 19 leaving Charing Cross for Golden Square with City Club Hotel alongside and other buildings as for 1186.1 in the background. Tram has Briquettes ad on front dash and SEC 'Electric Cooking' roof ad. 1186.5 - Bendigo 21in High St. at corner of Short St. heading for Charing Cross. Destination half way between Depot and Railway Station. Tram has ads for Cohns Drinks on dash panel, SEC 'Cook with Electricity' and a Sandhurst Milk roof ads.Information written on in black ink and date stamped in purple ink. 1186.1 - "No. 21 in Pall Mall at Charing Cross, Bendigo" 1186.2 - "No. 26 arriving at Alexandra Fountain, Charing Cross, Bendigo" 1186.3 - "No. 7 in Pall Mall at Charing Cross, Bendigo" 1186.4 - "No. 19 in High St., Bendigo, leaving Charing Cross for Golden Square" 1186.5 - "No. 21 in High St. Bendigo, at corner of Short St." tramways, trams, bendigo, charing cross, pall mall, high st., tram 7, tram 19, tram 21, tram 26 -
 Ballarat Tramway Museum
Slide - 35mm slide/s, Noel Simons, 21/11/1962 12:00:00 AM
Set of 6 transparencies taken on 21/11/1962 on Kodak mounts. 1189.1 - Bendigo No.11 at Quarry Hill terminus. Photo taken looking in along the route. Tram has destination of North Bendigo. 1189.2 - No. 21 in Pall Mall bound for North Bendigo. Tram has roof ads for Mamouney's furniture and SEC. In the background are the National Bank building, Dad and Dave's Cafe and the Beehive Buildings and the London Pharmacy. 1189.3 - No. 2 in Mitchell St, just after crossing over railway bridge. Photo taken after tram has passed photographer. Has what appears to be an SEC road works crew in the background. Has destination of Quarry Hill. 1189.4 - No. 17 climbing Mitchell St. on the start of the single track section, just before crossing the railway bridge. Has destination of Quarry Hill and the large Maples building sign in the background. 1189.5 - as for 1189.4 but after tram has passed photographer. Has an Ilford film roof ad and an SEC roof ad. Railway bridge in the background. 1189.6 - No. 21 at Charing Cross with passengers boarding. Tram has destination of North Bendigo and roof ads for SEC 'Electric Cooking' and Sandhurst Milk. In background are the buildings on the south side of High St. Also has a SEC worker in white overalls sweeping the track.Information written on in black ink and date stamped on purple ink. 1189.1 - "Birney car No. 11 in High St. Bendigo at Golden Square terminus" 1189.2 - "No. 21 in Pall Mall Bendigo near Charing Cross" 1189.3 - "No. 2 in Mitchell St. Bendigo, just after crossing bridge over railway line (Quarry Hill route)" 1189.4 - "No. 17 in Mitchell St. Bendigo, climbing the hill the bridge over the railway line. (Quarry Hill route)" 1189.5 - "No. 17 in Mitchell St., Bendigo approaching bridge over Railway line (Quarry Hill route)" 1189.6 - "No. 21 at Charing Cross, Bendigo"tramways, trams, bendigo, golden square, pall mall, mitchell st., quarry hill, tram 2, tram 11, tram 17, tram 21 -
 Ballarat Tramway Museum
Slide - 35mm slide/s - set of 3, Noel Simons, 22/11/1962 12:00:00 AM
Set of 3 transparencies taken on 22/11/1962 on Kodak mounts. 1190.1 - No. 7 (bound for North Bendigo) at the Charing Cross stop with No. 19 just left for Quarry Hill. Has the buildings on the south side of High St. in the background, including RACV building. No. 7 has front dash panel ad for Streets ice cream, and roof ads for Ilford Film and an SEC "Cook with Electricity". Passengers are boarding the tram. 1190.2 - Bendigo No. 2 at Charing Cross with fountain in the background and other buildings on the south side of High St. Tram has two SEC roof ads - good side on view - "Electric Cooking - Matchless" and "Switch to Electric Cooking". 1190.3 - Nos. 19, 2 and 7 at Charing cross with a Austin ? motor car. Has buildings on the south side of High St. in the background, along with SEC and Ilford film roof ads.Information written on in black ink and date stamped on purple ink. 1190.1 - "Nos. 19 and 7 at Alexandra Fountain, Charing Cross, Bendigo" 1190.2 - "No. 2 at Alexandra Fountain, Charing Cross, Bendigo" 1190.3 - "Nos. 19, 2 and 7 at Alexandra Fountain, Charing Cross, Bendigo" tramways, trams, bendigo, charing cross, alexandra fountain, tram 2, tram 7, tram 19 -
 Ballarat Tramway Museum
Slide - 35mm slide/s - set of 4, Noel Simons, Apr. 1967
Set of 2 slides made from the Association of Railway Enthusiast Provincial Tramways film strip, possibly during April 1967. 1192.1 and 1192.3 mounted in Kodak Ready Mounts. The others in plain white mounts. Slides dated Dec. 1968. 1192.1 - No. 21 out bound to Golden Square in High St., between Wattle and Vine Streets. Photo taken after tram has passed photographer. Has a sign for "Reid's Furnituorium" in the background. 1192.2 - Bendigo No. 28 dressed up as Myers Christmas tram, passing the Post Office and Courts in Pall Mall. 1192.3 - Bendigo No. 23 at Needle Loop en route to Eaglehawk. Tram has two SEC roof ads, one "Electric Cooking" and the other "Everything fine in my all electric kitchen". 1192.4 - Bendigo scrubber parked at the end of the main depot lead, alongside the depot office buildings.Details in blue ink, date hand stamped in purple ink. 1192.1 - "No. 21 heads along High St for Golden Square between Wattle and Vine Streets." 1192.2 - "Birney No. 28 in Christmas Garb, traverses Pall Mall en route to North Bendigo". 1192.3 - "No. 23 at Needle Loop on its run to Eaglehawk". 1192.4 - "Scrubber car at Bendigo Depot".tramways, trams, north bendigo, bendigo, bridge st loop, depot, tram 21, tram 23, tram 28, tram scrubber -
 Ballarat Tramway Museum
Slide - 35mm slide/s - set of 4, Noel Simons, 24/05/1971 12:00:00 AM
Set of 4 transparencies taken on 24/5/1971 on Kodak mounts. 1199.1 - No. 21 in High St. at junction with old High St., near Fire Station Loop. Tram has two SEC roof ads. 1199.2 - No. 21 in High St. between Shamrock and Thistle Sts. Photo taken after the tram has passed the photographer. 1199.3 - Photo of a green box containing timetables for the four Bendigo routes. Located at Charing Cross. 1199.4 - Bendigo No. 23 en route to Eaglehawk at Charing Cross, with two SEC roof ads 'Everything's fine in my all electric kitchen' and "Switch to electric cooking'. Has the Ezywalkin building and the Beehive building in the background. Information written on in black ink and date stamped on purple ink. 1199.1 - "No. 21 in High St. at junction with old High St., near Fire Station Loop." 1199.2 - "No. 21 in High St. between Shamrock and Thistle Sts." 1199.3 - "Bendigo Tramways timetable at Alexandra Fountain Charing Cross." 1199.4 - "No. 23 at Alexandra Fountain Charing Cross, Bendigo." tramways, trams, bendigo, timetables, charing cross, high st., tram 21, tram 23 -
 Ballarat Tramway Museum
Slide - 35mm slide/s - set of 13, Noel Simons, 24/05/1971 12:00:00 AM
Set of 13 transparencies taken on 24/5/1971 on Kodak mounts. 1200.1 - No. 7 en route to Golden Square turning from Bridge St. into Nolan St. Photo taken after tram has passed photographer. Tram has a briquettes roof ad. 1200.2 - No. 21 in McCrae St. just before Nolan St. Photo taken after tram has passed photographer. 1200.3 - No. 7 in Nolan St at corner with McCrae St. Passenger boarding tram at a tram stop. 1200.4 - No 7 turning from Nolan into McCrae St. with Golden Fleece service station in background. 1200.5 - No. 7 in Thunder St en route to North Bendigo. Photo taken after tram has passed photographer. 1200.6 - No. 5 en route to Eaglehawk just after leaving Needle Loop between Long Gully and California Gully. 1200.7 - No. 5 at the start of the double track in High St. Eaglehawk. 1200.8 - No. 5 at Eaglehawk terminus showing "Depot" with Leo A Hughes Photographer advertisement on building in background. 1200.9 - No. 5 at Eaglehawk terminus. Has two SEC roof ads 'Everything's fine in my all electric kitchen' and 'Electricity best for cooking'. 1200.10 - No. 5 at Eaglehawk terminus, with canon, war memorial outside Town Hall and Leo A Hughes Photographer advertisement on building in background. 1200.11 - No. 5 in McCrae St. about to enter Arnold St. and depot. Tram showing depot, has driver changing points. 1200.12 - No. 5 in Arnold St. Photo taken looking up the centre of the access track - shows the overhead at depot junction. 1200.13 - Depot entrance with signage at depot entrance and depot building in background.Information written on in black ink and date stamped on purple ink. 1200.1 - "No. 7 entering Nolan St. from Bridge St." 1200.2 -"No. 21 in McRae St. about to turn into Nolan St." 1200.3 - "No. 7 in Nolan St. at corner of McRae St." 1200.4 - "No. 7 turning from Nolan St. into McRae St." 1200.5 - "No. 7 in Thunder St. just after turning from Caledonia St." 1200.6 - "No. 5 just after leaving Needle Loop between Long Gully and California Gully. 1200.7 - "No. 5 in High St. Eaglehawk at start of double track." 1200.8 - "No. 5 at Eaglehawk terminus" 1200.9 - "No. 5 at Eaglehawk terminus" 1200.10 - "No. 5 at Eaglehawk terminus."\ 1200.11 - "No. 5 in McCrae St. about to enter Arnold St." 1200.12 - "No. 5 in Arnold St." 1200.13 - "Entrance to Bendigo Tram Depot, No. 5 running into shed."tramways, trams, bendigo, mccrae st, north bendigo, california gully, eaglehawk, depot, tram 5, tram 7, tram 21 -
 Ballarat Tramway Museum
Slide - 35mm slide/s - set of 32, Noel Simons, 25/02/1971 12:00:00 AM
Set of 31 transparencies taken on 25/2/1972 on Kodak mounts. 1201.1 - Bendigo No. 26 in Bond St. just after leaving Long Gully en route for Quarry Hill. Has Norris Supermarket in background. Has two SEC roof ads. 1201.2 - No. 26 climbing View St. from Charing Cross en route to Eaglehawk. Has ANZ bank and AMOCO service station in background. 1201.3 - as for 1201.3, but after tram has passed photographer. Has buildings west of Mackenzie St. in photograph. 1201.4 - Tram stop and centre of the road pole with two "CARS STOP BY REQUEST" signs mounted on pole at the corner of Mackenzie St. 1201.5 - same position as for 1201.3, but with No. 5 descending the street. 1201.6 - same position as for 1201.2, but with No. 5 descending the street. Photo taken after tram has passed photographer. 1201.7 - No. 7 in Nolan St. from across the park at Lake Weeroona. 1201.8 - No. 7 entering McCrae St from Nolan St. - distant view. Note "TRAM "sign on left hand side under tree and overhead in McCrae St. from former track that once was in this street. 1201.9 - No. 7 in High St. with Cathedral in background. Tram en route to North Bendigo. Note scaffolding around Cathedral main spire area. 1201.10 - No. 7 crossing Bendigo Creek bridge in High St. near Golden Square. Has a Caltex Service station in the background. 1201.11 - No. 7 at Golden Square terminus with Sunburst Fruit Juices and a Peters Ice cream delivery vans alongside. 1201.12 - as for 1201.11 but photo taken from behind tram, with the end of the rails in the photograph. 1201.13 - No. 7 and 21 in Pall Mall at Charing Cross with No. 5 in the background. Taken some distance away from the location. 1201.14 - No. 7 at Golden Square terminus, taken a short distance from the tram terminus. Shows Milk Bar on right hand side and the hotel on the left hand side. Taken from the south side of the roadway. 1201.15 - as from 1201.14 but taken from the north side of the roadway. 1201.16 - No 5 waiting at California Gully loop. Distant photo showing surrounds 1201.17 - No. 5 en route for Quarry Hill crossing No. 26 at California Gully. 1201.18 - No. 26 at Eaglehawk terminus with Eaglehawk Town Hall and Post Office in background. 1201.19 - No. 21 arriving at Charing Cross en route to North Bendigo. Has Alexandra Fountain in the background, ANZ bank RACV building, and other buildings on the north side of Pall Mall or Nolan St. 1201.20 - No. 26 en route for Quarry Hill at Charing Cross, with crew standing by front door. Has Colonial Mutual life building, Armstrong Tyre Service (Firestone) and a sign for Cohns Drinks in the background. 1201.21 - as for 1201.20 but with No. 5 en route to Eaglehawk now in photograph. 1201.22 - No. 26 at Quarry Hill terminus. 1201.23 - No. 26 at Quarry Hill terminus, view of front portion of tram only from a gate at the Bendigo cemetery. 1201.24 - Track at the end of the Quarry Hill line showing the point blades of the former "Y" terminus and the overhead for this. 1201.25 - No. 2 at the Quarry Hill terminus, looking along the former Trackwork. 1201.26 - as for 1201.25 1201.27 - number not used. 1201.28 - Golden Square terminus from some distance from the actual terminus, showing the Warning sign "TRAM" for motorists from the south. No. 7 at the terminus. 1201.29 - No. 7 passing through the Golden Square shopping centre. Numerous cars and pedestrians. Tram en route for North Bendigo. 1201.30 - No. 7 in High St. Golden Square, en route for North Bendigo. Photo taken after tram has passed photographer. 1201.31 - No. 7 in High St. just past Wattle St. with the Cathedral in the background. Tram has two SEC roof ads good side on photo, 'Everything's fine in my all electric kitchen' and 'Electrical cooking - clean, quick, economical'. 1201.32 - No. 7 in High St. nearing Wattle St. Has Cathedral in the background. Photo taken after tram has passed photographer.Information written on in black ink and date stamped on purple ink. 1201.1 - "No. 26 in Bond St just after leaving Long Gully" 1201.2 - "No. 26 climbing View St. from Charing Cross" 1201.3 - "No. 26 ascending View St. from Charing Cross (At Mackenzie St.)" 1201.4 - "View St. & Mackenzie St." 1201.5 - "No. 5 in View St. near Mackenzie St." 1201.6 - "No. 5 in View St. nearing Charing Cross." 1201.7 - "No. 7 in Nolan St. seen from Lake Weeroona Park." 1201.8 - "No. 7 entering McRae St. from Nolan St. Note "TRAM" warning sign on left. 1201.9 - "No. 7 in High St. passing Short St." 1201.10 - "No. 7 crossing Bendigo Creek bridge in High St. near Golden Square." 1201.11 - "No. 7 at Golden Square terminus" 1201.12 - "No. 7 at Golden Square terminus" 1201.13 - "No 7, 21 and 5 at Charing Cross" 1201.14 - "No. 7 at Golden Square terminus" 1201.15 - "No. 7 at Golden Square terminus" 1201.16 - "No 5 waiting at California Gully loop." 1201.17 - "Nos. 5 and 26 crossing at California Gully loop" 1201.18 - "No. 26 at Eaglehawk terminus" 1201.19 - "No. 21 arriving at Charing Cross from Golden Square" 1201.20 - "No. 26 at Charing Cross" 1201.21 - "Nos. 5 and 26 at Charing Cross." 1201.22 - "No. 26 at Quarry Hill terminus" 1201.23 - "No. 26 at Quarry Hill terminus seen through the gates of the Bendigo Cemetery." 1201.24 - "Quarry Hill terminus showing remains for former double track layout abandoned before 1964." 1201.25 - "No. 2 at Quarry Hill terminus" 1201.26 - "No. 2 at Quarry Hill terminus" 1201.28 - "The Southern approach to Golden Square with No. 7 standing at the terminus, "TRAM" warning sign on the left. 1201.29 - "No. 7 passing through Golden Square Shopping Centre" 1201.30 - "No. 7 in High St. Golden Square" 1201.31 - "No. 7 in High St. passing Wattle St." 1201.32 - "No. 7 in High St. nearing Wattle St."tramways, trams, bendigo, bond st., view st., nolan st., high st., eaglehawk, california gully, charing cross, quarry hill, trackwork, tram 2, tram 5, tram 7, tram 21, tram 26 -
 Ballarat Tramway Museum
Slide - 35mm slide/s - set of 12, Noel Simons, 28 Feb. 1972
Set of 12 transparencies taken on 28/2/1972 on Kodak mounts. 1207.1 - Bendigo 26 and 2 at Charing Cross. 26 en route for Eaglehawk, 2 for Quarry Hill. Has the Colonial Mutual Life, Armstrong Tyre Service, and Australian Mutual Provident Society buildings and a Cohns Drinks ad. in the background. 1207.2 - as for 1207.1 but with Alexandra fountain in the foreground. 1207.3 - No. 2 in Mitchell St. heading for Quarry Hill. Photo taken after tram has passed photographer. Has buildings on either side of Mitchell St. in the background, including the Plaza Theatre. 1207.4 - No. 6 en route for Golden Square departing Charing Cross. Has the RACV and ANZ bank in the background. 1207.5 - No. 2 crossing Pall Mall to enter Charing Cross ex Quarry Hill, with the Fountain Plaza in the background. 1207.6 - No. 6 arriving Charing Cross ex Golden Square with No. 21 alongside. No. 21 has the SEC ad. 'Everything's fine in my all electric kitchen.' Has the City Family Hotel and the Fountain Plaza shopping centre in the background. 1207.7 - No. 5 at Charing Cross en route for Quarry Hill with No. 2 behind. No. 2 has two SEC roof ads, 'Everything s fine in my all electric kitchen' and 'Electricity best for cooking'. RACV building in the background. Tram crews are discussing the day in the front of the tram. 1207. 8 - No. 21 in High St. Bendigo with the Cathedral in the background. No. 21 has two SEC roof ads, 'Everything's fine in my all electric kitchen' and 'Electricity best for cooking'. 1207.9 - No. 6 in High St. Bendigo with the Cathedral in the background. 1207.10 - No. 6 in High St. Bendigo, just past Wattle St. Photo taken after the tram has passed the photographer from within the Highway Car Sales yard. 1207.11 - No. 26 bound for Eaglehawk at the end of the double track in View St., note signal contactors, tram stop and section signs mounted on pole. 1207.12 - No. 26 turning from View St. into Barnard St.Information written on in blue ink and date stamped on purple ink. 1207. 1- "Nos. 26 and 2 at Charing Cross." 1207.2 - "Nos. 26 and 2 at Charing Cross." 1207.3 - "No. 2 in Mitchell St. just after leaving Charing Cross." 1207.4 - "No.6 leaving Charing Cross for Golden Square." 1207.5 - "No. 2 arriving at Charing Cross from Quarry Hill." 1207.6 - "No. 21 waits at Charing Cross as No. 6 arrives from Golden Square." 1207.7 - "No 5 at Charing Cross with No. 2 lurking behind." 1207.8 - "No. 21 in High St. at cnr of Wattle St." 1207.9 - "No. 6 in High St. at cnr of Wattle St." 1207.10 - "No. 6 in High St. between Wattle and Vine Sts." 1207.11 - "No. 26 at end of double track in View St. near Barnard. St. 1207.12 - "No. 26 seen at dusk turning from View St. into Barnard St."tramways, trams, bendigo, charing cross, high st, view st., tram 2, tram 5, tram 6, tram 21, tram 26 -
 Ballarat Tramway Museum
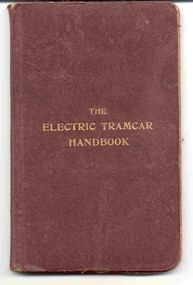
Book, W.A. Agnew, "The Electric Tramcar Handbook", 1920
Book titled "The Electric Tramcar Handbook written by W.A. Agnew. Book has dark red cloth covers, gold block titled on front only, with tipped in end papers, title page, contents pages, three introductory pages by author, 127 pages of text, five index pages and six folded sheets interspersed in book with wiring or controller diagrams. Book finished with red tinted edging. Book published by The Electrical Review Limited, London in 1920, 8th edition. On inside end paper, has ESCo Ballarat office stamp with date 30/9/1924, a glued in white sheet of paper with handwritten notation "To be returned to Mr. P. Bath Motorman No. 51, City Office 9.1.63" and on bottom left hand corner a "Tait Book Co. 90 William St. Melbourne" label that has also been glued in. Primary contents chapters include: The Electric Circuit Electric Tramways Electric Tramcars Controllers Brakes On the Road Faults and Breakdowns. See above for inside end paper.trams, tramways, tramcars, tramways, technical books, handbooks -
 Ballarat Tramway Museum
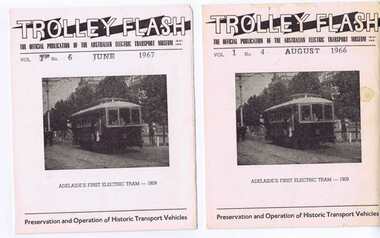
Magazine, Australian Electric Transport Museum (SA) Inc, "Trolley Flash, Vol 1, Nos. 4 & 6", Aug. 1966
In house periodical produced by the AETM for its members and friend, pre-printed covers and page 2, with Vol No. and date hand stamped. Photo of A1 on front cover. 307.1 - Vol. 1 No. 4 - August 1966, features items on "Green Goddess" Trolley bus, reports, display in No. 42, , replacement parts and visit of MTT Publicity Officer. 307.2 - Vol 1 No. 6 - June 1967, Museum to open in July, Assistance from the EW&S, AGM, new members (includes N. Gower), Trolley bus No. 417 and electrical equipment ex Rapid Bay. Image added 16.11.2013trams, tramways, aetm, sth australia., adelaide -
 Ballarat Tramway Museum
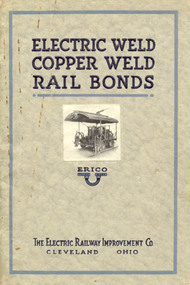
Book, The Electric Railway Improvement Co. (ERICO), "Installation of Rail Bonds by Electric and Copper Welding", c1920s
Book, titled, "Installation of Rail Bonds by Electric and Copper Welding". Consisting of a 36 page book, printed with many photographs, two tones (black and grey) printed in grey and black ink illustrating the equipment that was made by The Electric Railway Improvement Co. of Cleveland Ohio, USA. Covers in addition to the 36 pages, are on the outside, marbled paper, bluish grey, with embossed dark blue titles and company logo (ERICO), with light blue bands and a photograph of a rail based welding machine on the front cover. Stapled with three staples. On page 2, has been over stamped in purple ink, the name and address of the Australasian representative, "Charles Wright". Date of printing not given in document, estimated to be c1920. See also item Reg. No. 1639, for notes on bonding costs and return circuits.trams, tramways, trackwork, rail bonding, erico, welding -
 Ballarat Tramway Museum
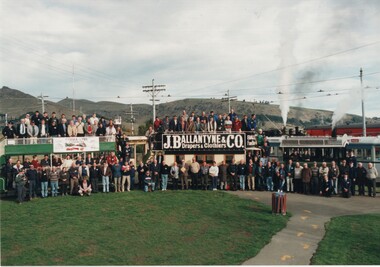
Document - Report, Douglas Johns, "Proceedings of the Fourteenth Conference of the COTMA", 2000
110 page A4 sized bound document - "Proceedings of the Fourteenth Conference of the Council of Tramway Museums of Australasia in conjunction with the Annual Conference of the National Federation of Rail Societies Inc. 29 May to 4 June 1998." Has plastic cover, green inside cover with title and white back cover. Is wire bound. Front page has the title details. Edited by Douglas Johns. Front page gives title of conference logo and theme "Conference '98 The Way Ahead", details of the Conference Hosts, (Tramway Historical Society Inc.), venue, convenor and conference management. Page 3 has colour photograph of the delegates assembled in front of Kitson Steam No. 7 and double decker trailers Nos. 10 and 74 at Ferrymead. (14th Conference) Contents: 1. Papers Opening address by Clive Peter, Chief Executive of Christchurch Transport Ltd. Key Note address - Phil A'vard Recording and preserving today for tomorrow Steam Engine Driver's Report Adding value to your product Internet help for the voluntary society What to do until the Coroner comes Computer cataloguing your collection The role of the regulator in rail transport safety Victorian electric train preservation History is more than rolling stock - remember the infrastructure Heritage fundraising in the public sector The Christchurch Tramway - 3 1/2 years on Museum trams on commercial tramways Remember the Society in your will The future of Tramway topics How to increase revenue for your museum Transport deregulation - a personal view Acquiring tram parts from Calcutta Model tramway clinic. 2. Annual Reports 3. Trip Reports 4. programme, attendees, NRFS Reports. Photograph of participants added 22/3/2021. For a scan of the actual proceedings see the cotma.org.au/proceedings.Page 1 has BTM Received stamp, date (17 Oct. 2000) and item No. 9639.trams, tramways, cotma, christchurch, proceedings, conferences -
 Ballarat Tramway Museum
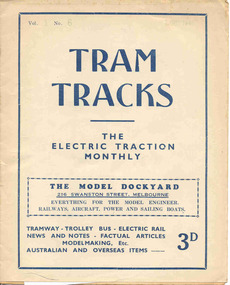
Magazine, Jack Richardson, "Tram Tracks - The Electric Traction Monthly", Oct to Dec. 1946
Three issues of "Tram Tracks - The Electric Traction Monthly" of the Australian Electric Traction Association. Each issue has a standard cover, of the magazine name etc, with a small advertisement for the Model Dockyard but are in different colours, all have been saddled stapled with two staples. The Volume and date details have been over stamped using a hand stamp. Back covers, inside back covers have the same advertisements. The three issues contain advertisements for Hartleys Sports store, Hearns Hobbies, Wattle Park, Johnson's Variety Store, Barnes Tennis Centre, The Model Dockyard, Meadmore Model Engineering and Austral Bronze Pty Ltd, Christie Scale Model Railway and Equipment, Herbert Small (Meccano) and Bassett-Lowke Models. 2464.1 - Vol. 1, No. 6 - 12 pages, Oct. 1946, with cover printed in blue. Has articles on staff and ticket working on VR tramways, Tramway rolling stock classification, rolling stock listing for SEC Bendigo, and the first 65 years of electric traction. News items on Sydney, Melbourne, Ballarat, Newcastle, Hobart and AETA. Inside front cover has a photo of Y1 611. 2464.2 - Vol. 1, No. 6 - 16 pages, Nov. 1946 with cover printed in brown. Has articles on bus profits, route symbols on Australian tramways, Hobarts double deckers, high current collection tests, rolling stock listing for SEC Geelong, VR Electric locos, and the first 65 years of electric traction continued. News items on Sydney, Melbourne, Ballarat, VR, Brisbane, Adelaide, Perth, Fremantle, Kalgoorlie, overseas and AETA. Inside front cover has photos of Sydney R and R1 class trams. 2464.3 - Vol. 1, No. 7 - 12 pages, Dec. 1946 with cover printed in green. Has articles on NSW tram and bus losses, proposed abandonment of the Sandringham - Block Rock line, Elwood Depot, rolling stock listing of NSW Service stock. Has news items on Brisbane, Sydney, Newcastle, Melbourne, Adelaide and AETA news. trams, tramways, electric traction, aeta, models, australian tramways -
 Ballarat Tramway Museum
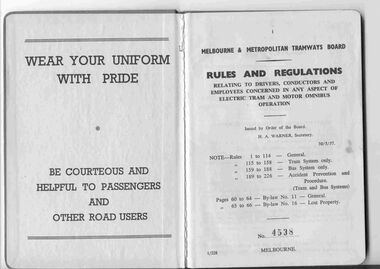
Book, Melbourne and Metropolitan Tramways Board (MMTB), "Melbourne and Metropolitan Tramways Board Rules and Regulations", May. 1957
Book with brown Rexene covers, round corners, sewn down centre with self end papers, 68 pages, excluding end papers. Details the MMTB Rules and Regulations relating to drivers, conductors and employees concerned in any aspect of electric tram and motor omnibus operations. Issued with date 30/5/1957. Numbered on page 1 in black ink stamp "4538". Has a number of pencil, ink and printed amendments glued into the relevant part.trams, tramways, mmtb rules, rules, drivers, conductors, buses -
 Ballarat Tramway Museum
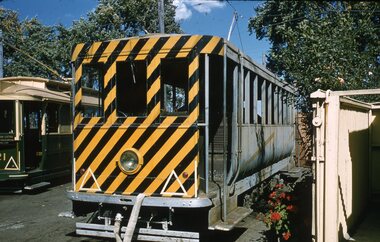
Slide - 35mm slide/s, Ben Parle, 5/04/1958 12:00:00 AM
Kodachrome Transparency - 35mm slide - cardboard mount, with one side with red border and words "Kodachrome Transparency / Processed by Kodak" top and bottom. Photo taken by Ben Parle 5/4/1958. Has slide No. "11" stamped in red in top corner and date stamped on slide. Photo of scrubber tram on depot fan, with No. 21 with a "Australian Electric Traction Association Special Car" auxiliary board. For high resolution scan see btm2840h.tif"Ballarat Depot" "-5 APR 1958"tramways, trams, wendouree parade, depot, ballarat depot, scrubber tram, aeta, scrubber, tram 21 -
 Ballarat Tramway Museum
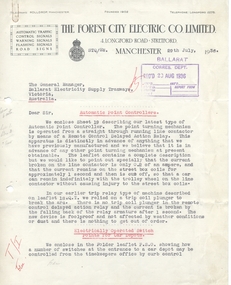
Pamphlet, The Forest City Electric Co. Limited England, "Forest City" products, 1936
Yields information about the equipment offered to Ballarat at the time of the determining what type of signals to put in to improve safety on the system, following the take over by the SEC of the tramways. Gives details about other tramway equipment available on the market place.A set of documents under cover of a Forest City letter dated 29/7/1936 to the General Manager Ballarat, typed in black and red ink. Has a date received stamp of 20 August 1936. Contains the following items. 4911.1 - Letter from "The Forest City Electric Co. Limited" to ESCo re Point controllers, tramway signals and warning signs, dated 29/7/1936 - 2 pages 4911.2 - Collins Patent Automatic Point Turner - sheet 19 - 4 pages - sheet 19, two copies 4911.2a - ditto, sheet 18 QT - four pages 4911.3 - Electrically operated Point switches, overhead frogs and signals for tramcar depots. - four pages 4911.4 - Automatic Tramway Signals - five pages - sheet ATS1 4911.5 - Universal Insulator - Sheet 17 - 2 pages 4911.6 - Porcelain hangers - sheet 15/1 - 2 pages 4911.7 - Porcelain insulators for cap and cone suspensions - page 11, 1 page. 4911.8 - Motor Bus and Tramcar Stage and Fare Signs in Cast Aluminium - sheet MD2 - 1 page 4911.9 - Flashers and Spellers - Sheet F1 - 2 pages 4911.10 - Forest City Relays - 2 pages 4911.11 - Traffic light - 1 page, sheet 2A Note the letter the price of the non car counting signals is 20 pounds, including freight.On letter notes in margins and margin on page 2 against tramway signals, marked in red. On rear of page 2 is a pencil sketch.trams, tramways, signals, overhead, traffic lights, points -
 Ballarat Tramway Museum
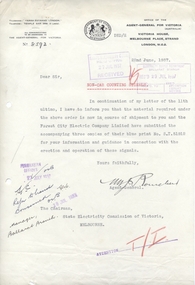
Document - Letter/s, Forest City Electric Company and Victorian Agent General London, "State Electricity Commission of Victoria Type B Non-car counting signals", Jun. 1936
Yields information about how letters were exchanged between the Forest City Electric Co and the SEC using the Victorian Agent General in London. Yields information about the various parties processes and letterheads.4913.1 - Duplicate copy of letters from the Forest City Electric Company, titled "State Electricity Commission of Victoria Type B Non-car counting signals" forwarding blueprints of drawing ST 51912 to the Agent General for Victoria London for the SEC, dated 18/6/1936, on watermarked paper. 4913.2 - Original of letter dated 22/6/1937 to the SEC Melbourne, received 27/7/1937 in Melbourne and forwarded to Ballarat by 29/7/1937 from the Agent General for Victoria London forwarding the Forest City letter. Has various date stamps and hand written notes.trams, tramways, overhead, signals, forest city signals, trolley wire -
 Ballarat Tramway Museum
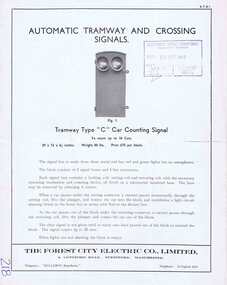
Pamphlet, The Forest City Electric Co. Limited England, "Automatic Tramway and Crossing Signals", c1948
Yields information about the types of tramway signals available for use on tramways systems. The type BY was used by the SEC in Ballarat and Bendigo.Four page Pamphlet or Brochure Forest City ATS1, printed brochure with illustrations "Automatic Tramway and Crossing Signals" – four types noted. Four types: 1. Tramway type "C: Car counting signal, up to 10 cars 2. Tramway type "BY" - non car counting signals 3. Level crossing signal operated by approaching cars 4. Turning Warning signals with notes on rear page of the set up for automatic control signals for rail crossings on roads, docks etc. Date stamped by SEC 20/9/1949 on front cover.Has “218” in biro in bottom left hand corner.trams, tramways, forest city signals, level crossings, signals -
 Greensborough Historical Society
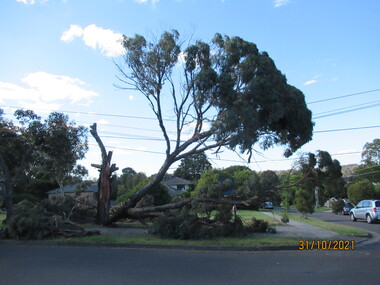
Photograph - Photograph - Digital Image, Peter Simmenauer, Storm damage, Barclay Park 2021, 27/10/2021
Storm damage incurred on night of 27-28/10/2021 at Barclay Park, cnr. Mackenzie Street & Plenty Lane, Greensborough. SES have lopped some of the dangerous tree limbs, but some are still resting on electric and communication wiring. Colour digital photographDate stamped: 31/10/2021barclay park, mackenzie street greensborough, plenty lane greensborough, storm damage -
 Greensborough Historical Society
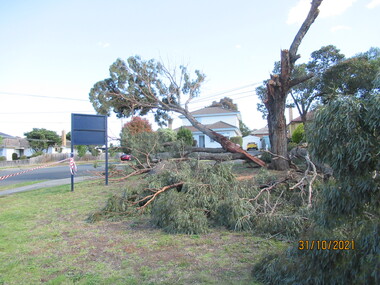
Photograph - Photograph - Digital Image, Peter Simmenauer, Storm damage, Barclay Park 2021, 27/10/2021
Storm damage incurred on night of 27-28/10/2021 at Barclay Park, cnr. Mackenzie Street & Plenty Lane, Greensborough. SES have lopped some of the dangerous tree limbs, but some are still resting on electric and communication wiring. Colour digital photographDate stamped: 31/10/2021barclay park, mackenzie street greensborough, plenty lane greensborough, storm damage -
 Greensborough Historical Society
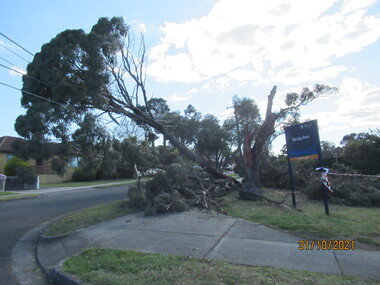
Photograph - Photograph - Digital Image, Peter Simmenauer, Storm damage, Barclay Park 2021, 27/10/2021
Storm damage incurred on night of 27-28/10/2021 at Barclay Park, cnr. Mackenzie Street & Plenty Lane, Greensborough. SES have lopped some of the dangerous tree limbs, but some are still resting on electric and communication wiring. Colour digital photographDate stamped: 31/10/2021barclay park, mackenzie street greensborough, plenty lane greensborough, storm damage -
 Ballarat Tramway Museum
Book, Australian Commonwealth Engineering Standards Association, "Parallel sided carbon brushes for DC Commutator Machines", 1927
Book - 16 pages + grey covers, side stapled, issued by the Australian Commonwealth Engineering Standards Association, Tentative Australian Standard C.43-1927, "Parallel sided carbon brushes for DC Commutator Machines". Dated Dec. 1927. Provides an index and information about carbon brushes including drawings.On top right hand corner has stamp of the "The Electric Supply Co. of Victoria Ltd Ballarat" and date "19 May 1928".trams, tramways, tramways, electrical equipment, motors -
 Ballarat Tramway Museum
Book, British Engineering Standards Association, "Cast Steel Wheel Centres for Electric Tramcars", "Wrought Iron Wheel Centres for Electric Tramcars", 1922
.1 - Book - 20 pages + light grey cover, issued by the British Engineering Standards Association, British Standard Specification for "Cast Steel Wheel Centres for Electric Tramcars". Dated April 1922. Has standard Number 150-1922. Provides materials specification, testing and an index. .2 - Book - 16 pages + light grey cover, issued by the British Engineering Standards Association, British Standard Specification for "Wrought Iron Wheel Centres for Electric Tramcars". Dated April 1922. Has standard Number 149-1922. Provides materials specification, testing and an index. Both copies has the stamp of the "Tait Book Co. 90 William St. Melbourne" on the lower edge and in the top right corner, the ESCo Ballarat company stamp and the date "14 September 1923". trams, tramways, tramways, electrical equipment, wheels -
 Ballarat Tramway Museum
Book, Australian Commonwealth Engineering Standards Association, "Electrical Performance of Traction Motors - Direct Current Series Wound", 1925
Book - 24 pages + grey covers, side stapled, issued by the Australian Commonwealth Engineering Standards Association, Tentative Australian Standard C.2 - 1925, "Electrical Performance of Traction Motors - Direct Current Series Wound". Dated Dec. 1925. Provides an index and information about enclosures, ratings, testing and information to be supplied.On top right hand corner has stamp of the "The Electric Supply Co. of Victoria Ltd Ballarat" and date "17 April 1934".trams, tramways, tramways, electrical equipment, motors